
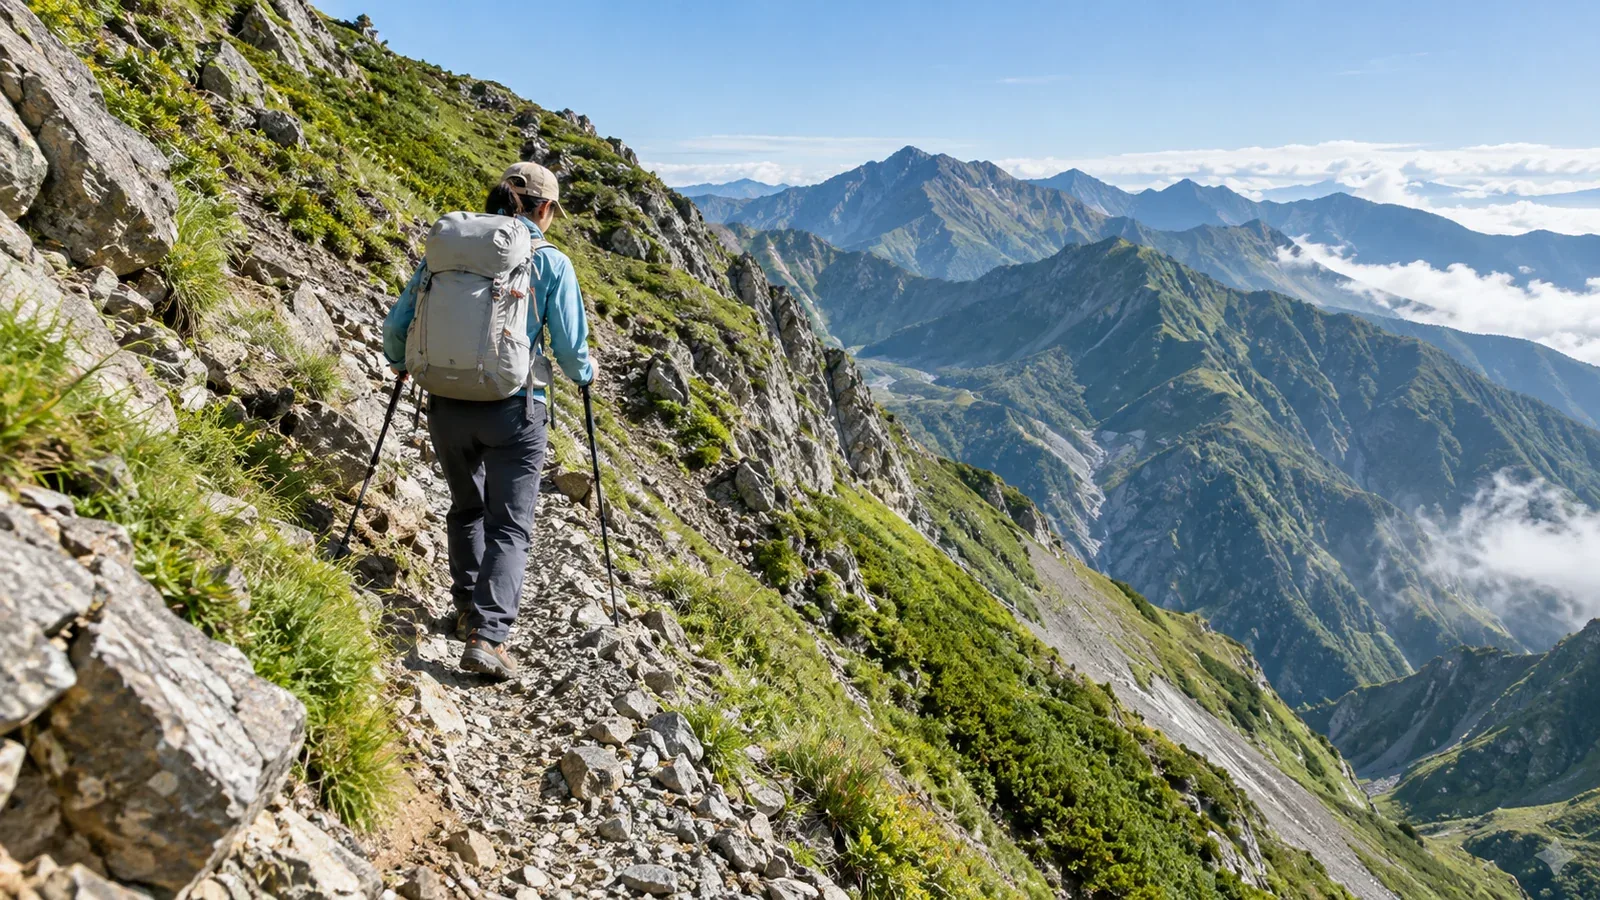
Japanese hiking guides and route descriptions sometimes call a section a traverse. Here, the term means walking across the face of a slope. Instead of going straight up or down, you move sideways, either along the contour or at a gentle diagonal.
Traverses are used to connect sections while avoiding a ridge or stream, gain height without going straight up a steep slope, or reach the far side of a mountain. When a guide describes a long traverse, expect an extended stretch of sideways travel.
For beginners, the challenge is learning how to orient the body and manage balance. This guide explains where you will find traverses, how to move and when to take particular care.
Where you encounter traverses
Many routes labelled makimichi on Japanese hiking maps are traverses. They bypass a steep section of a ridge by crossing the mountainside to a col or ridge farther on.
You may also traverse to bypass rock or a lingering snowfield and reach safer ground. On a summer hike, you might move horizontally along the lower edge of a gully with snow still in it and climb again from there.
If a guide describes a traverse to a col, it usually means gaining height diagonally across the slope rather than climbing straight to it. Compare the route map with a topographic map in advance to see which slope you will cross and in which direction.
How to move: balance and foot placement
Foot placement is the biggest change from walking on flat ground. Your uphill and downhill feet meet the slope at different angles. Trying to keep both feet parallel can make you lean downhill.
Think about lowering the heel of the uphill foot. The angle can make it harder to bend that knee, so press the heel toward the slope to make firm, flat contact. Use the full sole of the downhill foot as well, rather than standing on the toes alone. This way of placing the sole flat is known as flat-footing.
With adjustable trekking poles, make the downhill pole a little longer and the uphill pole shorter to account for the slope. If the uphill pole has an extended grip, holding it lower is another way to shorten its effective length. Poles set to equal length may leave the uphill arm awkwardly extended and upset your balance.
Keep your centre of gravity over your feet or slightly uphill. Leaning downhill as you reach for the next step makes it harder to stop if your foot slips.
Conditions that need extra care
Wet grass and mud
Wet grass and soil are far more slippery than when dry. Even a grippy sole may slide on muddy grass. Move slowly, placing and testing each foot before committing weight and taking the next step. Use the same deliberate approach you would use to keep secure points of contact.
Lingering snow and hard snow surfaces
Hard snow may linger on shaded high slopes from spring to early summer. Light four- to six-point crampons and chain-style traction devices may not bite well on steep hard snow. A steep crossing may require mountaineering crampons, such as 10- to 12-point models, an ice axe and the skills to use them. Check the angle and snow conditions, along with equipment guidance from the local authority or a hut. If you lack the equipment or experience, choose another route or turn back.
Rockfall and loose rocks
Watch what is above you as well as what is underfoot. Loose stones may fall, especially when another group is higher on the slope. A helmet can offer protection from rockfall, so consider one on rocky traverses.
Common problems on a descending traverse
A descending traverse can be harder to manage than one that climbs. Fatigue makes it harder to concentrate on each weight transfer, and gravity pulls you downhill while you are trying to move across the slope.
To keep focused, avoid staring into the valley below. Looking down into the drop can draw attention and weight away from the next step. Keep your eyes on the route just ahead of the next foothold.
Descending also puts more strain on the knees. If they hurt, slow down and take short breaks on secure ground rather than forcing a steady pace. If a health condition affects your hiking or the pain persists, consult your doctor.
How to decide when to turn back
Recognising that a traverse is beyond your present skills matters. If any of these apply, consider turning back or returning with someone who has the necessary experience.
- The foothold is narrow and you cannot identify the next step.
- The slope is too steep to place your foot securely and flat.
- The soles are packed with soil or snow and you cannot check their grip.
- A sudden change in weather is making visibility or footing worse.
- You do not have the equipment the crossing requires, such as crampons.
Continuing in the hope of finding better footing can leave you unable to turn back. Decide while you still have the time and energy to retreat.
What to do next
Practise on a short, gently sloping bypass trail on a local low mountain, paying attention to flat-footing. In Nordwand’s Base Camp, you can find other hikers working on the same skills or look for a certified guide. If a route crosses lingering snow, check the equipment and current conditions with the local authority or hut before you set out.