
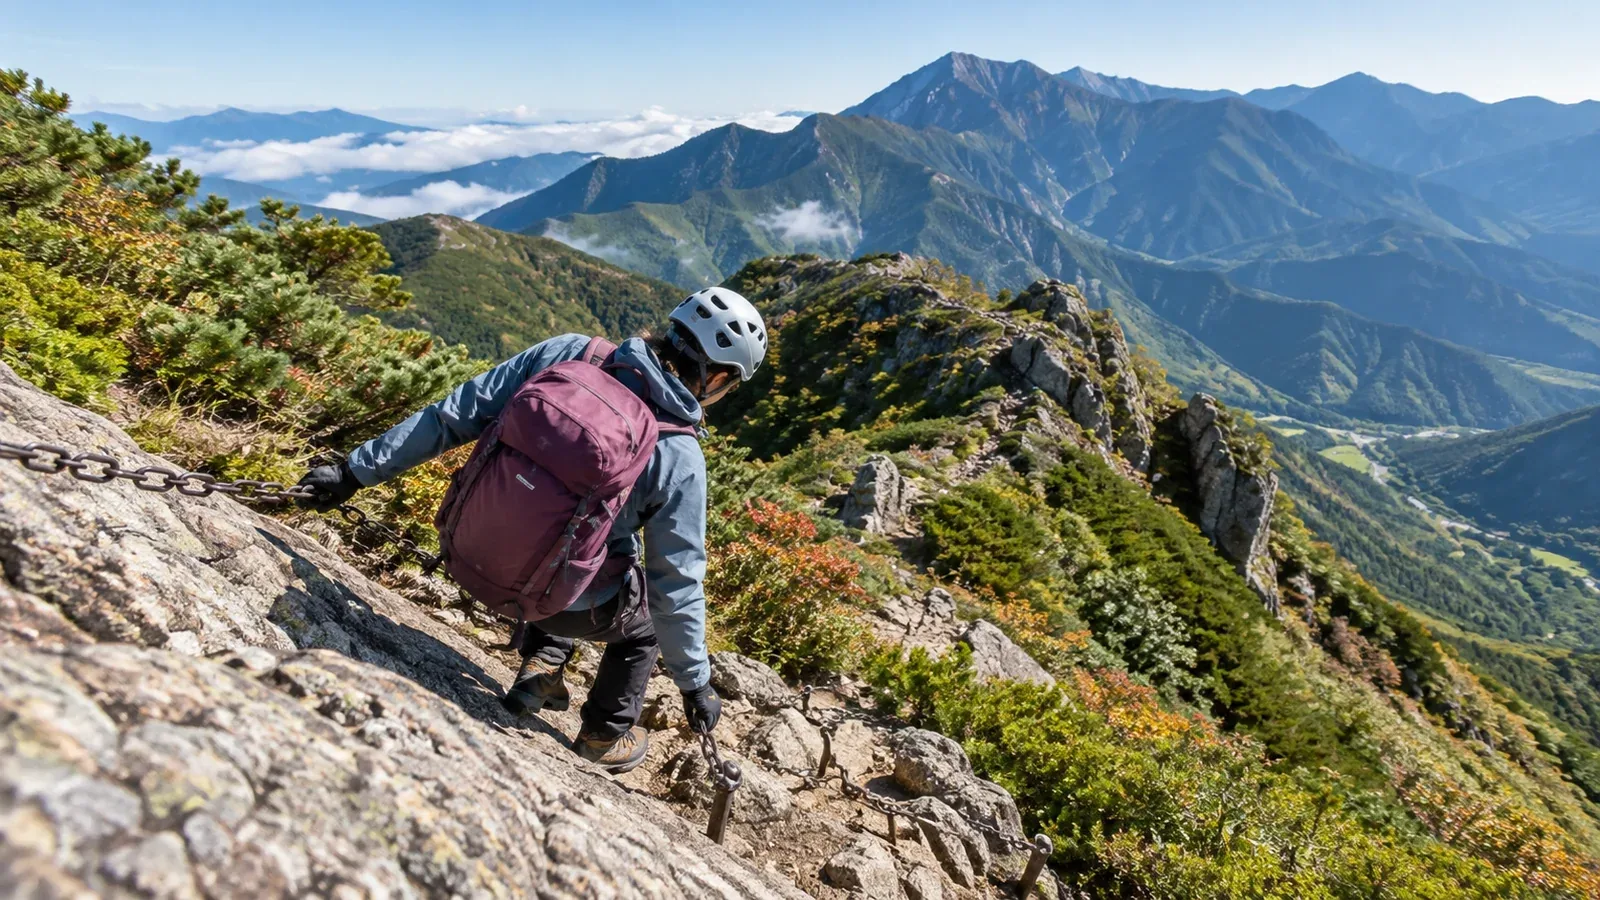
For your first chain-assisted hike, choose terrain you can assess and leave safely. A short chain may help with balance, while a steep exposed wall can be difficult to reverse. Find out what the route actually involves before you set off.
The criteria below help you choose a practice site that matches your experience and use it in conditions you can manage.
What makes a chain section difficult
Check four things before committing to a section.
Steepness and holds. Look at the size, stability and spacing of handholds and footholds, and how easy it will be to reverse the moves. A short steep step can be demanding.
Rock condition. Water, mud, moss or ice can make holds unreliable, and loose rock can shift. Check conditions on the day. The rock type alone cannot tell you how much grip you will have.
Condition of the chain. Look for loose anchors, damage, ice or other signs that the aid may be unreliable. The number or spacing of anchors alone tells you little. Treat the chain as a balance aid. If you are unsure about its condition, use the official bypass or turn back.
Exposure and a way out. Look at the consequences of slipping and where you could stop, turn around or take an official bypass. For practice, choose low terrain with stable ground and no serious consequences if you lose balance.
Practise standing firmly on your feet and moving your weight between stable holds. Use the chain for balance and keep movements controlled. A fixed trail chain is not a fall-arrest system.
Three things to look for in a practice route
Look for a short section, an established alternative and a descent you can manage.
1. Short section with secure ground at either end
Choose a section you can see from stable ground with room to wait and regain balance on either end. Avoid long or sustained exposed sections for a first outing. Chain length alone says little about difficulty.
2. Maintained trail with an alternative
Check whether there is an official bypass or an easy retreat before the section. For example, Hidaka City describes a rocky Otoko-zaka and a gentler Onna-zaka at Mount Hiwada. This shows how routes can differ at a junction. Check local conditions and suitability before choosing either path. A solid line on a map does not guarantee an escape route.
3. Descent you can manage
Choose a route with a straightforward way down. Practise descending on appropriate low terrain with an experienced companion or instructor, and use the chain in both directions only where permitted and safe. Follow one-way signs and give others room to clear the section.
How to read maps and route information
Use these sources to check whether a route meets those conditions.
Hiking maps, paper or digital. Look for chain and ladder symbols, the trail classification and marked alternatives. Read the specific map’s legend. A symbol locates a feature and may give little detail about its difficulty.
Local authority or official tourism website. Look for experience recommendations, route diagrams and access notices. Check for temporary closures, maintenance and seasonal restrictions.
Huts and visitor centres. Ask about current conditions and marked bypasses, including whether rock is wet, icy or damaged. Check when the information was last updated.
Japan Meteorological Agency forecasts. Check the latest warnings and timed regional forecast for precipitation, wind and temperature. Conditions on the mountain can differ from the regional forecast. Change plans if wet or icy rock would exceed your skills.
Recent hiking reports can help you visualise the route. Compare their date and conditions with your own plan and use official notices for restrictions.
How to practise on a chain section
Plan the sequence before reaching the start and practise with an experienced companion or qualified instructor.
1. Check your footholds before taking the chain. Put each foot on solid rock and check the next move from a balanced position. Use the chain as an aid and avoid hauling yourself up on your arms.
2. Keep three secure points of contact. On steep ground, move one hand or foot at a time, leaving the other three on reliable holds. Check each new hold before shifting your weight onto it.
3. Plan the descent before climbing. On steep rock, facing the rock can help you use secure holds. Choose moves you can reverse with control and follow local directions. If you cannot see or reach a reliable foothold, stop on secure holds and ask for guidance.
4. Leave room for other hikers. Wait on stable ground outside the path of rockfall. Enter an exposed chain section one person at a time, once the person ahead has cleared it, and follow signs.
5. Decide when to turn back. Turn around from secure ground if you cannot identify the next moves, the rock or chain is unsafe, or you cannot continue with control. If you are already stuck, hold your position, tell others and ask for help. Call 119 or 110 in Japan from a safe place if someone is injured or there is no safe way out.
Equipment and clothing
Check your equipment before leaving and adjust it on stable ground before using the chain.
- Gloves. If you wear them, choose a close-fitting pair that lets you feel and grip the holds. Test them in safe terrain and account for cold or wet conditions.
- Footwear. Choose hiking footwear that fits securely and grips the terrain you expect. Practise placing your feet before trying a steep section.
- Pack. Secure the load and loose straps, and adjust the hip belt and chest strap so the pack stays close without restricting movement. Stow poles on stable ground before using your hands.
- Helmet. Wear a properly fitted mountaineering helmet where falling rock or head impact is a risk. Put it on before entering exposed terrain and check local recommendations.
Before your first outing
Check the route manager's information for the location of the chain, restrictions and alternatives, and check the latest weather forecast. Choose another route if the rock is wet or icy and you cannot pass safely. You can ask about the approach and safe waiting areas in Nordwand’s Base Camp, or practise with a qualified guide.
Further reading
- Japan Meteorological Agency timed regional forecasts
- Geospatial Information Authority of Japan map guide
- Shobunsha hiking maps
- National Police Agency mountain incident reports
References and sources
- Japan Meteorological Agency · Timed regional forecasts
- Geospatial Information Authority of Japan · How to use GSI Maps
- Shobunsha · Yama to Kogen hiking maps
- National Police Agency · Mountain incident reports
- Hidaka City · Mount Hiwada trails
- Nagano Prefectural Mountain Center · Group hiking handbook
- Nagano Prefecture · Areas where helmets are recommended
- Japanese Alpine Club · Practical hiking skills session
- Japan National Tourism Organization · Emergency numbers