
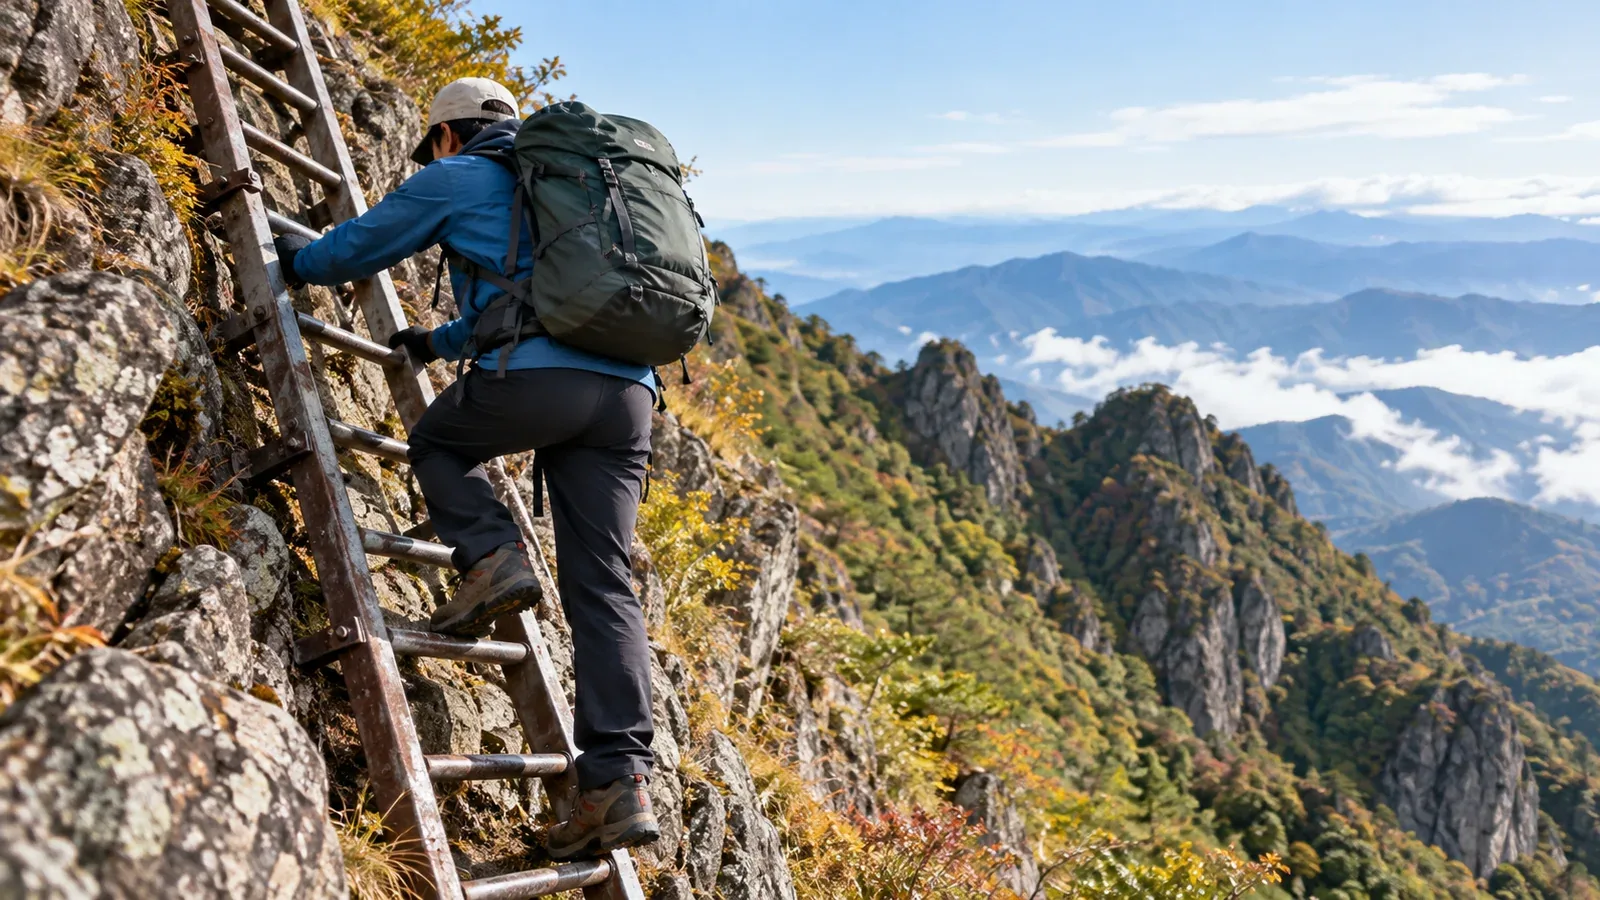
A fixed ladder gives you regular places to put your feet, but wet rungs, a heavy pack or a difficult transition at the top can change how you move. Look at the entire section before stepping on and keep three secure points of contact while climbing or descending.
This guide covers the approach, ascent, descent and checks to make before you use a ladder on a mountain trail. Practise on a low, secure ladder in controlled conditions before relying on the technique at height.
What is different about a trail ladder?
On chain sections you choose natural holds as you go. A ladder usually has regularly spaced rungs and rails, but their condition and the entry and exit can vary.
A regular pattern can help you move steadily, but avoid moving by habit. On descent your view of the next rung may be limited, especially near a transition. Slow down and confirm each placement.
From stable ground, look for missing or damaged rungs, loose fixings, corrosion or obvious movement. Never step on a ladder to test a suspect installation. If it looks damaged or unstable, take a permitted alternative or turn back, and report it to the trail manager.
Three points of contact on ascent
Keep two hands and one foot or one hand and two feet secure as you move the remaining limb. Face the ladder and keep your hands free of other equipment.
Choose secure handholds
Use the handholds the installation provides, following local instructions. Take a full, stable grip on a sound rung, rail or purpose-made handhold as appropriate. Move only one hand or foot at a time, and avoid relying on a grip that can slide or come loose.
Place your foot securely on the rung
Choose a stable part of the rung and make solid contact with your boot before shifting weight. Keep your body centred and avoid reaching to the side. Check for ice, mud and other material that can reduce grip.
Use a deliberate rhythm that preserves three secure contacts during every move. Pause before difficult transitions. If you cannot reach the next support without losing control, stop and reassess from a secure position.
Three points of contact on descent
The next rung can be hard to see on descent, especially when stepping onto a ladder from above. Inspect the entry and landing before committing. If there is a separate designated descent, follow local signs.
Face the ladder on descent
Face the ladder when climbing up or down. Hold the installed handholds and stay centred over the rungs. The entry and exit deserve the same care as the middle of the ladder.
Check that you can reach the first rung from stable ground and that the landing is clear. Wait for the previous person to clear the section unless the operator gives different instructions. Avoid a ladder if the transition is beyond your skills.
Find the next rung before shifting weight
Locate the next rung and confirm your boot is secure before transferring weight. Keep your grip and avoid reaching too far or rushing because someone is waiting.
Use this sequence to check each move.
- Face the ladder, take secure handholds and confirm the rung supporting you.
- Move only one hand or foot while the other three contacts remain secure.
- Place the moving foot securely on the next rung before transferring weight, or confirm a firm grip if moving a hand.
- Continue one contact at a time. Check the landing or next platform before stepping off.
If you cannot confirm a hold, pause while you still have secure contacts. If you can’t continue or retreat safely, ask for help.
Moving with a backpack
A pack can pull you away from the ladder or catch on the rock. Secure straps and loose equipment before you start. Check whether you can stay centred and move without being pulled off balance.
Fatigue and a heavy pack make rushed movements more likely. Rest on stable ground first. Change the plan if the group cannot keep control on the ladder, including near the end of the hike.
Follow posted weight or equipment rules. There’s no universal pack weight for trail ladders. If a route has a designated system for moving packs, get instructions from the manager or a qualified guide before using it.
Wet, snowy or icy ladders
Rain, dew, mud, moss or ice can reduce grip on rungs and handholds. Look at the entry and exit too, since these can be slippery even when the middle of the ladder is clear.
If you can’t maintain secure contacts throughout, take a permitted alternative or turn back. Slowing down does not restore grip on wet or icy surfaces.
Snow can hide rungs, and crampon points can catch on them. Ask the local manager or guide about winter access and the appropriate equipment. Avoid trying an unfamiliar technique on an exposed ladder.
Before visiting a route with ladders
Ask the municipality, park office, hut or other manager about closures, damage, permitted direction and winter conditions. Check the approach and return as well as the ladder itself.
Plan for slower progress when several ladders come near the end of the route. Allow time and energy for descent and consider an alternative before the first exposed section.
Your next step
Practise facing a low, secure ladder and moving one limb at a time, with instruction if needed. Check the actual route and conditions before your trip. Nordwand’s Base Camp and guide request tools can help you find someone who knows the route.
References and sources
- Nagano Prefecture · Safe movement on rock, ladders and chains
- Japan Mountaineering and Sport Climbing Association · Mountain coach training criteria
- OSHA · Facing the ladder and maintaining three points of contact
- Health and Safety Executive · Grip and body position on ladders
- National Police Agency · Mountain incident reports
- Japan Mountain Guides Association · Qualification scope