
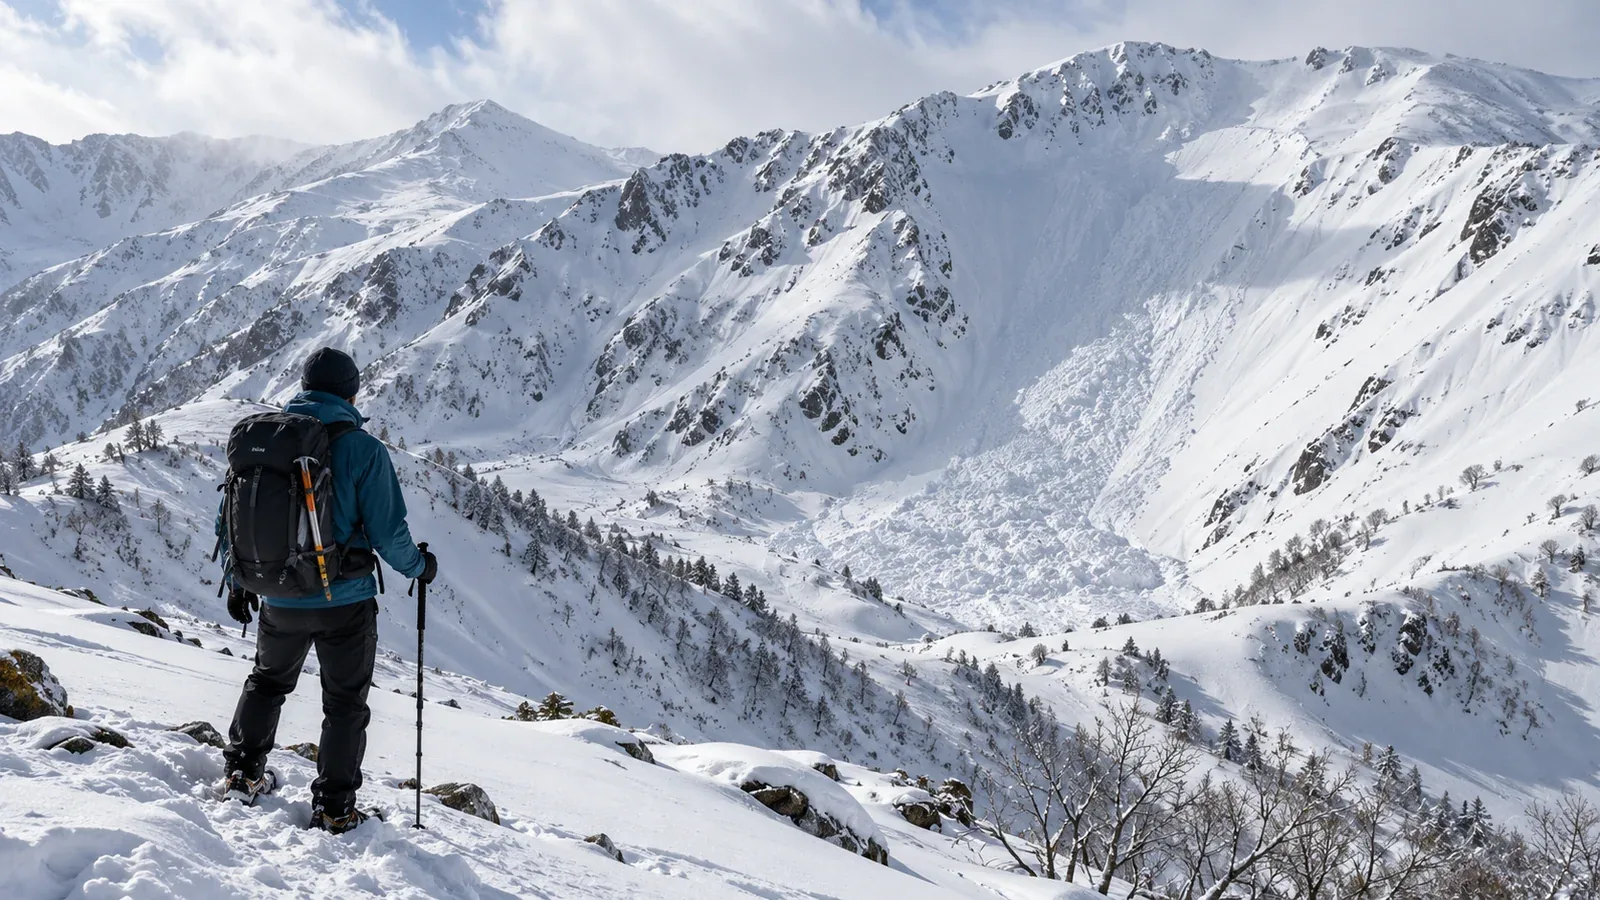
Avalanche danger depends on the terrain, snowpack and weather. Understanding how they interact helps you decide which terrain to avoid and when to change your plan.
Avalanches can reach people on gentle or flat ground below a steep slope. Check slope angle, aspect, snow conditions and recent weather together. This guide explains what to look for before leaving and from secure terrain along the way.
Where avalanches start and where they reach
The Japan Avalanche Network identifies 30–45° slopes as a common range for dry slab avalanches to start. Other avalanche types and slopes outside that range can still be hazardous. The angle under your feet does not tell you whether snow can reach you from above.
Look at the whole slope and its connection to other terrain. Pay attention to the start zone, the path the snow could take and where it could stop.
Tracks and runouts. Snow can release high on a slope, travel along a gully or across open ground, and stop on gentler terrain. Valley floors, gully mouths and fans can be exposed to a slope well above you. Identify these areas on the map and from a secure viewpoint.
Rollovers, hollows and wind-loaded slopes. Convex rolls can hide steeper ground, and hollows can collect wind-blown snow or avalanche debris. Wind can load slopes behind ridges and along the sides of gullies. Use the shape of the terrain and recent wind direction to identify areas to avoid.
Open slopes and trees. Open, steep snow can be avalanche terrain, including a summer trail covered by snow. Sparse trees do not rule out avalanche danger. Dense trees, openings and the slopes above still need to be considered together.
Weak layers in the snowpack
Many slab avalanches release when a fracture spreads in a weak layer under a cohesive slab. The slab can be soft or hard. A person can sometimes trigger a release from a connected area away from the start zone.
These conditions can contribute to instability. Their effect depends on how layers form and are buried.
- Temperature changes. Temperature differences within a snowpack can form weak, faceted grains. Sudden warming or rain can also weaken snow in a different way. Check recent conditions and the local avalanche problem.
- Clear, calm weather. Surface hoar can form when the surface cools. Once buried and preserved, it can become a persistent weak layer.
- Buried surface snow or frost. Low-density snow, facets or surface hoar can be covered by a more cohesive layer. Local observations and avalanche information help identify the problem.
- Rain or a melt-freeze crust. Rain can weaken the snowpack. A crust can provide a hard surface and influence weak-layer formation near it. Its presence alone does not identify the hazard.
Weak layers may be hidden and unevenly distributed. Signs of instability can show that a problem is present, while a lack of signs does not establish stability.
Weather to check before leaving
Consider the weather and snow changes over recent days as well as today's forecast. Check how the changes relate to elevation and slope aspect.
New snow and how quickly it fell
Heavy or rapid snowfall adds load. How much matters depends on the existing snowpack, temperature and wind. A snowfall total alone cannot tell you when a slope is safe.
Strong wind
Wind can move snow onto sheltered slopes and build a cohesive wind slab, sometimes without new snowfall. Look for drifting snow and recent wind direction. Avoid suspicious loaded slopes and their runouts.
Warming and rain
Sun, rapid warming or rain can weaken snow and increase wet-avalanche danger. Watch for signs such as snowballs rolling downhill, wet loose avalanches or deeply wet surface snow. Conditions can change at different times on different aspects and elevations.
Check Japan Meteorological Agency warnings and forecasts and the Japan Avalanche Network's regional information where available. JAN reports conditions observed in its covered areas. Check the date, area and elevations. Look for local route notices, and revise the plan if you cannot assess the terrain or conditions.
Signs to notice while travelling
Keep observing from secure terrain. If you see signs of instability, use an alternative that avoids avalanche exposure or turn back.
Shooting cracks and whumpfs. Cracks that shoot away from you and a whumpf from collapsing snow are warning signs. They can indicate a weak layer and a slab that may release on connected steep ground. Do not enter another exposed slope to test it.
Recent avalanches. A fresh crown fracture, track or debris can show that slopes have released. Similar aspects and elevations may still be unstable. A slope that has already released can also remain hazardous.
Cornices and wind loading. Overhanging cornices can break farther back than the visible edge and trigger a slope below. Keep well away from their edges and the terrain beneath them. Wind drifts can also indicate where snow has accumulated.
Share observations and reassess. If anyone hears a collapse, sees a crack or notices recent debris or rapid warming, communicate it as soon as you are in a secure place. Treat uncertainty as a reason to use a safer line or retreat.
Deciding whether to go, change route or turn back
Agree on a conservative plan before leaving. Make decisions from secure ground and identify an alternative that avoids connected avalanche terrain.
- Act on a warning sign. A recent avalanche, collapse or shooting crack is a reason to avoid exposed terrain. The absence of warning signs does not guarantee a slope is stable.
- Avoid exposure while learning. Choose gentle terrain with no connected start zone or runout above it. Time spent in a path and group movement can affect exposure, but crossing one at a time does not make a hazardous slope safe.
- Agree on turnaround criteria. Decide what you will do if the weather, snow or route differs from your plan, or if anyone is uncomfortable. Tell the group in advance and turn back while you have a secure option.
- Learn companion rescue separately. In avalanche terrain, each person needs a working transceiver, probe and shovel and training to use them. Practise companion rescue with an instructor. Rescue equipment cannot prevent an avalanche.
Your next step
Check the regional avalanche information, the latest weather and official route notices. Use a map to identify steep start zones, tracks and runouts before choosing a low-exposure outing. Take practical avalanche training with your partners before entering avalanche terrain.
Official and technical resources
- Japan Meteorological Agency warnings and winter information
- National Police Agency mountain incident statistics
- Japan Avalanche Network terrain, weather observations and training
- Avalanche Canada guidance on signs of instability and terrain traps
References and sources
- Japan Meteorological Agency — Weather warnings and advisories
- National Police Agency — Mountain accidents and statistics
- Japan Avalanche Network — Avalanche terrain and common release angles
- Japan Avalanche Network — Scope and basis of avalanche information
- Japan Avalanche Network — Selecting safer terrain
- Japan Avalanche Network — Avalanche awareness and rescue courses
- Avalanche Canada — Signs of instability
- Avalanche Canada — Terrain traps
- Avalanche Canada — Transceiver, probe and shovel