
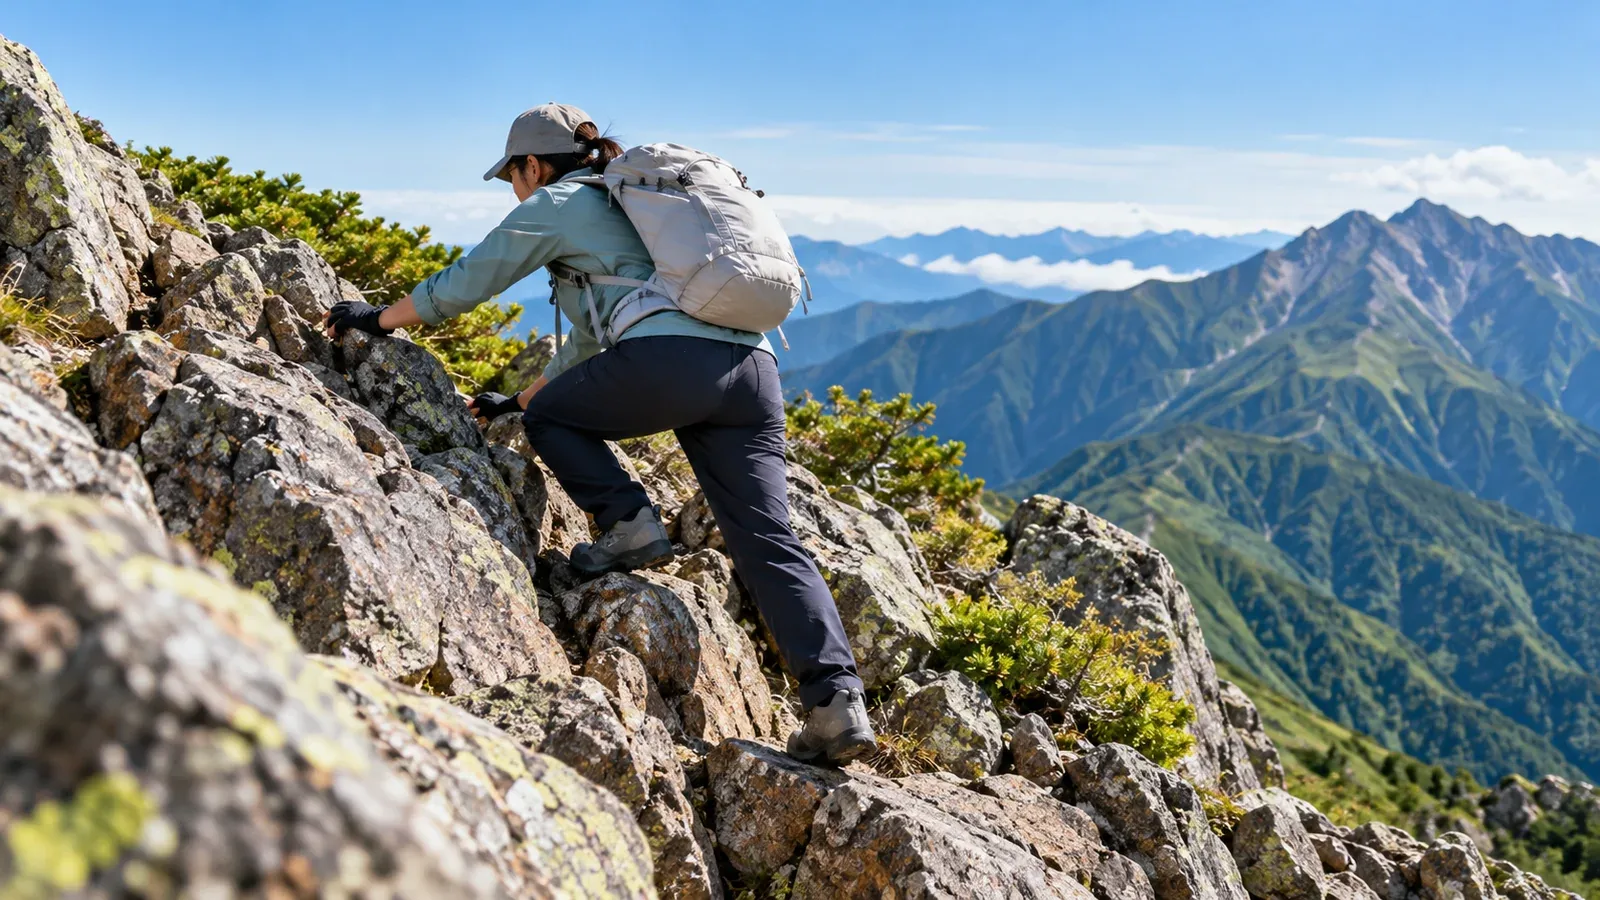
On rocky or chain-assisted sections, you may hear people say to keep three points of contact and wonder what to do. The technique means keeping three of your hands and feet in firm contact with rock, a fixed chain or a ladder while moving just one limb. Moving two or more limbs at once leaves at most two points of contact and makes it harder to regain balance.
A casual lapse in judgment on rocky terrain can lead to a fall. On flat ground you can walk on two feet, but on an unstable slope, more secure contacts give you a greater margin. Three points of contact is one of the basic rules that can help reduce risk.
Why three points rather than four?
With all four limbs fixed in place, you cannot move. Keeping three fixed lets you move the fourth forward or back while staying steady. Moving just one limb at a time is the principle behind the technique.
Three firm points make it easier to stay steady if your centre of gravity shifts. Think of a four-legged table with three legs on the floor. Move two limbs at once and you are down to two points of support. If a foot slips at that moment, you may be left with just one.
The basic sequence
Before reaching the rocks, check that your gloves fit and your laces are secure. When gripping a chain or rock, wrap the pads of your fingers and your thumb around a firm hold.
Going up
- Stop with both hands and both feet on secure holds.
- Look for the next place to put the foot you want to move.
- Move only that foot, put weight on the foothold once it is secure and pause.
- Move one hand to the next hold, check that your grip is secure and pause again.
- Repeat the sequence.
At some point you will feel tempted to rush and move two limbs together. Learning to resist that impulse is the heart of the practice.
Going down
Descending is often harder than climbing because the next foothold is harder to see and your weight tends to shift forward. On a steep chain-assisted descent, face the rock and look for the next foothold while keeping three points of contact. Move one foot at a time and check that the foothold is stable before shifting your weight.
Place the sole of your boot on a firm foothold and check that it grips before transferring your weight. Choose a position where the boot can sit securely given the size and shape of the hold.
Common mistakes
Moving a hand and foot together. Reaching up with your right hand while stepping with your right foot may feel natural when walking, but it lifts two points of contact at once on rock. Get used to alternating one hand and one foot.
Letting go before locating the next handhold. If you let go before finding the next hold, it is easier to lose a stable three-point stance. Look at where the hand will go first, then move it.
Taking bigger moves as you tire. When your arms and legs tire, it gets harder to pause after each move and tempting to combine movements. Slow down early in the rocky section so you still have energy at the end.
Dropping your guard on a short rocky section. You may be tempted to skip the technique if the rock is low or the slope gentle. Injury depends on the landing surface as well as fall height. Practising the basics on low rocks builds habits for harder terrain.
Where to practise and how to build confidence
The movement is best learnt through repetition on low steps. Look for steps a few tens of centimetres high on trails or low slopes with exposed roots. Practise moving one limb at a time while keeping three points of contact.
When you try a chain-assisted section for the first time, choose a quiet time so you can pause without feeling rushed. Hikers behind you can make you feel pressured. Take the time you need to get through safely.
Before planning a hike with rocks or chains, check the local difficulty, maintenance and whether there is a way around. Look at trailhead notices, official information from local authorities and huts, and map symbols for rocky and chain-assisted sections.
What to do next
Before your first rocky section, try moving one limb at a time on low steps or paths with exposed roots near home. When choosing a mountain with fixed chains, check official sources from the local authority or huts for difficulty and upkeep. In Nordwand’s Base Camp, you can also meet local hikers who know rocky terrain and ask an experienced person to join you on an unfamiliar route.
References and sources
- Japan Sport Council, National Mountaineering Training Center: training guidelines, 8-1, basic climbing movement
- Komagane City: before climbing, crossing difficult rock, ladder and chain-assisted sections
- Japan Mountaineering and Sport Climbing Association: certified mountain coach assessment standards, movement on rocky terrain