
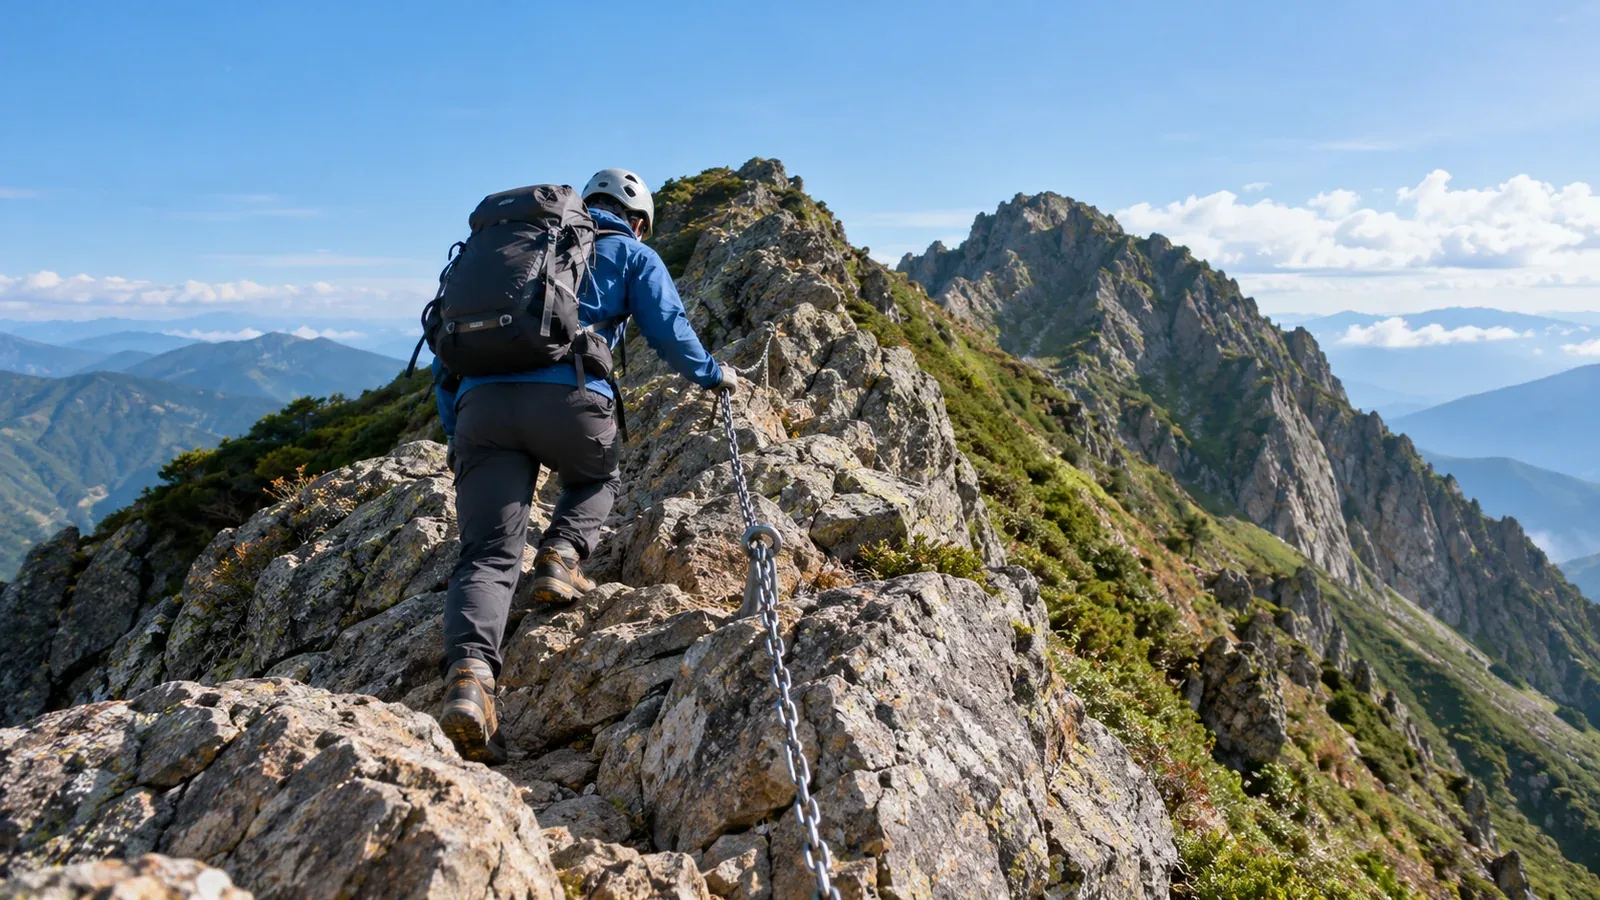
Guidebooks warn of rocky ridges, routes with three fixed chains, and vertical ladders. Each obstacle calls for a different technique and a different kind of preparation.
Here is what each term means, what to check before you commit, and how to approach the obstacle. The guide addresses practical questions such as whether a route with a fixed chain suits beginners and how to climb a trail ladder.
What is a rocky ridge?
A rocky ridge (ganryō) is a ridge where the rock is exposed. Underfoot you find bedrock or large blocks in place of soil and grass. The slopes on either side often drop steeply, so a fall can be serious.
The term describes the terrain. Some rocky ridges are gentle, while others require scrambling with hands and feet. If the route description mentions one, look for details about the moves involved and check the trail manager's guidance or trailhead signs.
Use three points of contact (santen shiji). Keep three of your four limbs in contact with the rock to help maintain balance. Look for the next hold or foothold and move one limb at a time.
What is a fixed-chain section?
A fixed-chain section (kusariba) is a rock face or steep slope equipped with a metal chain. Bolts secure the chain to the rock so that hikers can use it as a handhold.
The trail manager installed the chain to help hikers climb or descend that section. Difficulty still varies and the chain offers assistance only. If you hang all your weight on it, it can swing and pull your feet away from the rock.
How to cross a fixed-chain section
- Check footholds before you grab the chain. Look for ledges or recesses where you can place your boots. Support your weight on your feet and use the chain to steady yourself.
- Maintain three points of contact. Trying to haul yourself up with both hands can lift your feet and make you swing. A secure free hand on the rock can help stabilize you.
- Leave room between hikers. Falling rocks or a hiker who loses their footing can endanger anyone directly below. Generally, wait until the person ahead has cleared the section.
- Take extra care on descent. Footholds can be harder to see from above. On steep rock, face the rock, look for your next foothold, and move one limb at a time.
Consider wearing a helmet on routes with long or repeated chain sections. Rockfall is a hazard on these routes and head protection matters.
What is a trail ladder?
A fixed ladder gives you clearly defined footholds, but the height and near-vertical angle can take some getting used to. Metal or wooden ladders can appear several times along the same route.
Two common errors are missing a rung on the way up and backing down too quickly.
How to climb and descend a ladder
- Face the ladder and maintain three points of contact. Grip a rung or side rail securely. Keep two hands and one foot, or one hand and two feet, in contact as you climb.
- Plant each foot firmly, one rung at a time. Check that the boot sole is securely on the rung before transferring weight.
- Face the ladder on descent as well. Turning outward shifts your weight away from the ladder and raises the risk of a fall. Find the next rung and descend one at a time.
- Check your pack's balance. A heavy pack can pull you backward. Adjust it before climbing if it feels as though the weight is behind you.
How to decide whether to continue
Use these checks at rocky ridges, fixed-chain sections and trail ladders.
Checks to make beforehand
- Number and length of obstacles. One fixed-chain section demands much less stamina and technique than ten.
- Weather and rock conditions. Rain and fog can leave rock slippery. Rocky ridges and chains are considerably harder in and after rain. Check official weather information, such as the Japan Meteorological Agency's forecasts.
- Your experience. An experienced partner or certified guide makes a difference on your first route with rocky ridges, chains or ladders.
When to turn back
- You cannot see footholds at the start of a chain or feel unable to move because of the exposure.
- You cannot leave enough space between hikers to avoid being struck by falling rocks.
- You notice that fatigue or cold is affecting the strength of your hands or feet.
Turning back is a skill you can practice. Take hesitation seriously when something about the obstacle feels beyond you.
Basic gear checks
Check your gear before heading out on a route with these obstacles.
- Sole grip. Choose hiking boots with soles that grip rock. Wet rock can be slippery even in hiking boots.
- Gloves. Holding a chain for a long stretch can hurt. Thin gloves also protect your hands from cold metal and rust.
- Helmet. Strongly consider wearing one on routes with rocky ridges or chains. It protects your head from falling rocks and falls.
Gear choices depend on elevation, season and your fitness. Ask a hiking outfitter if you are unsure.
Before you go
Check the latest trail conditions and notices from the local authority, mountain hut or trailhead. For a first route of this kind, consider hiring a certified guide. The Nordwand app lets you contact certified guides and find others planning to hike the same mountain. Ask a hiking outfitter about gear before choosing your route if you need advice.
Further reading
- National Police Agency of Japan, Overview of Mountain Distress and Rescue Incidents
- Japan Meteorological Agency, mountain weather information
- Mountain rescue advisories from prefectural police