
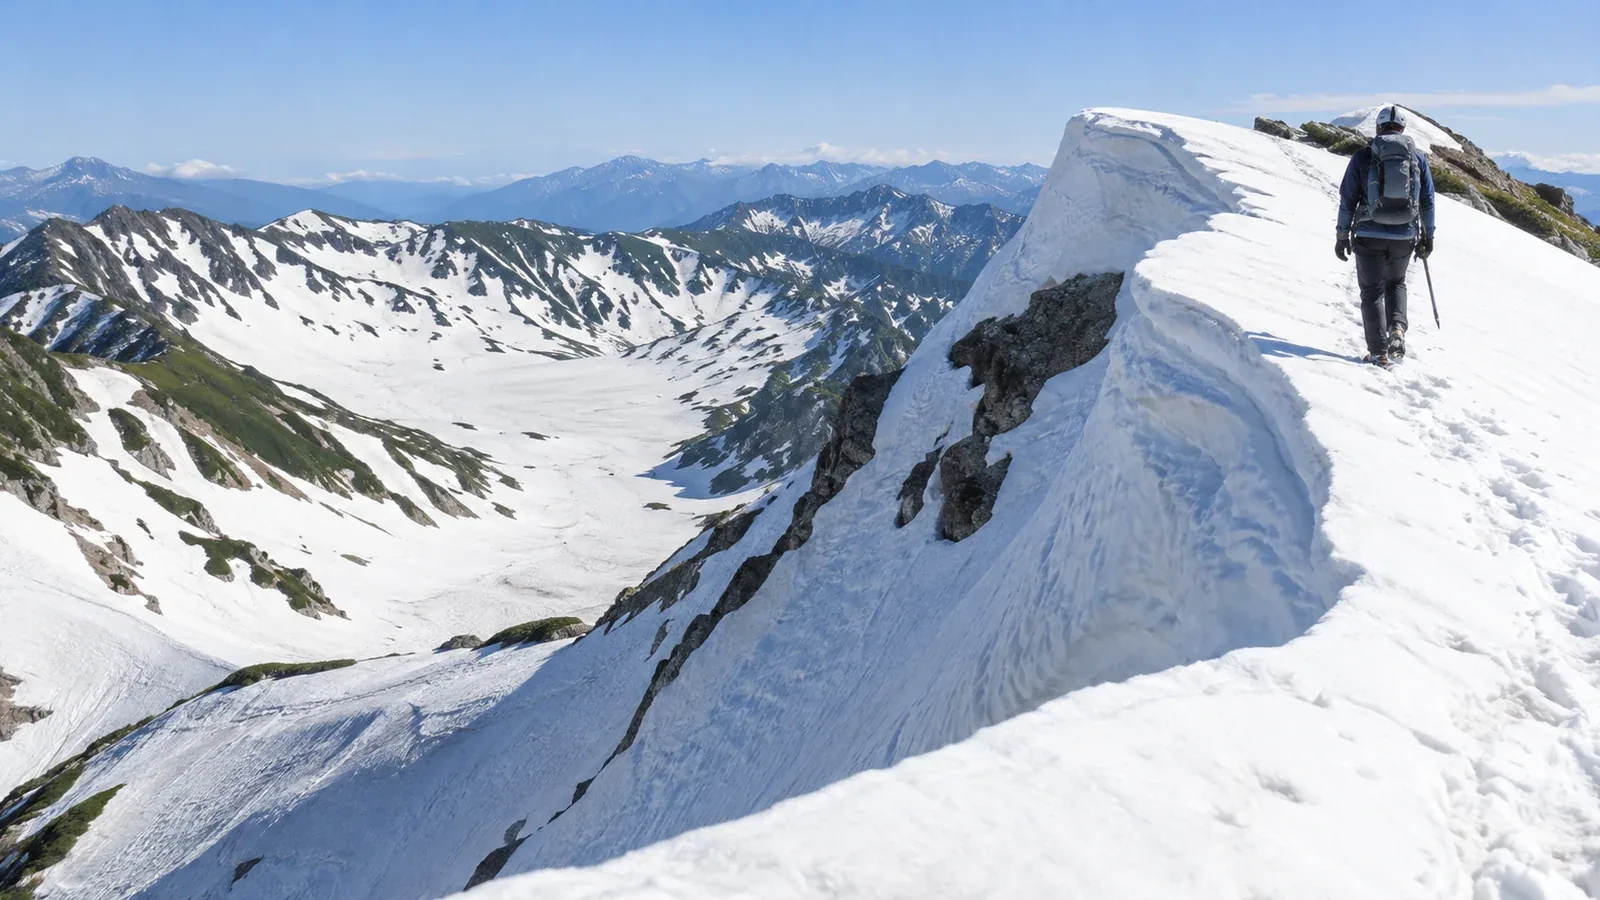
Route reports warn of cornices, snow gully traverses and avalanche danger. The words describe different phenomena, each with its own risks.
If you confuse the three, you may misread the danger. A cornice can collapse underfoot, a snow gully can turn a slip into a long fall, and an avalanche can sweep you away. Each calls for different decisions. Here is what the terms mean, where the hazards arise and what beginners should check.
Cornices: Overhanging snow along a ridge
A cornice (seppi) is an overhang that forms on the sheltered side of a ridge. Wind carries snow over the crest, where it builds outward. An overhang can look like solid ground from above. It can collapse under your weight, and the fracture can extend back from the visible edge.
From above it is hard to tell where the ground ends and the overhang begins. Poor visibility, new snow or following the line of a summer trail can make it particularly easy to stray onto a cornice.
What beginners should check
- Stay away from the leeward edge of a ridge. Check the map and the terrain to work out which side is sheltered. In many Japanese ranges, winter winds often come from the west or northwest, though terrain changes the local wind.
- Stop if you see cracks in the snow. Long cracks sometimes form along the root of a cornice.
- Give an uncertain edge a wide berth or turn back. A pole or boot cannot reliably locate the safe boundary. Stay away from terrain directly below a cornice, too.
- Leave space between people. Choose a line that gives everyone a wide margin from the cornice.
Cornices are more likely to fall during rapid warming, often in early spring, or when strong winds quickly pile up more snow. Time of day alone cannot establish safety. Ask a local hut or the authority that receives hiking plans about current weather and ridge conditions.
Snow gullies: Snow that lasts into summer in valleys and ravines
A sekkei is a strip of snow that survives into summer in a valley or ravine. Some last into the next year and others melt during summer. Hakuba Daisekkei and Tsurugisawa in the Northern Japan Alps are well-known examples. Snow gullies also occur in the mountains of Tohoku and Hokkaido.
Two main hazards are sliding falls and rockfall.
The snow often softens as temperatures rise, especially in the afternoon, but can be very firm early or in shade. Boot soles may offer little grip on hard snow, and a slip can turn into a long slide. Crampons are metal spikes attached to boots for traction.
Rocks can fall from above or from the gully walls. As the snow melts, it can release rocks that it had held in place.
Basics of crossing a snow gully
- Bring appropriate crampons and choose when to put them on. Match them to the slope and snow firmness. Fit them in a stable place before entering slippery terrain.
- Enter steep, hard snow only with the skills and gear it requires. Practice using crampons and an ice axe, including self-arrest, beforehand. Trekking poles cannot replace an ice axe.
- Follow current route advice and avoid rockfall paths. Stones and tracks on the surface can reveal rockfall, but rocks can reach places with no visible marks.
- Watch the lower end of the snow. The snow may thin where the gully drains, with running water underneath. A collapse can drop you into the stream.
Snow depth, cracks and the frequency of rockfall vary from year to year. Ask the local hut or the authority responsible for mountain trails before heading out.
Avalanches: Snow moving down a slope
An avalanche (nadare) happens when snow on a slope gives way and flows downhill. A cornice breaks away at a ridge edge. A large avalanche can exceed 100 km/h and can be deadly.
A surface-layer avalanche releases the upper part of the snowpack. Take particular care after snowfall or strong winds. A full-depth avalanche releases the snowpack down to the ground. These occur more often when temperatures rise in early spring.
Recognizing avalanche danger
Research and field observations point to several warning conditions.
- Slopes around 30–50 degrees. Many slab avalanches start at these angles. They can run out onto gentler ground below.
- After significant snowfall or strong winds. New or windblown snow can destabilize the snowpack. The danger can persist for days.
- Rapid warming. A sudden warm spell or rain raises the danger of wet-snow avalanches.
- A deep thump or cracks that shoot across the snow. These indicate instability.
Beginners have difficulty assessing these conditions on their own. If you are entering avalanche terrain, travel with someone trained and experienced or a certified guide.
Preparing for avalanche terrain
Check avalanche forecasts before leaving. Use a map to identify both possible release slopes and the terrain below where snow could run out. Change your route or turn back when danger is high or you cannot assess the terrain.
Everyone entering avalanche terrain should carry an avalanche transceiver, a probe and a shovel. Practice is essential to using them in a rescue. Alpine clubs, outdoor schools and guiding organizations run courses in using this equipment.
Comparing the three hazards
- Where: Cornices form along ridge edges, snow gullies in valleys and ravines, and avalanches on steep slopes and in the runout below.
- Main hazard: A cornice can break underfoot or fall from above. On a snow gully, the main dangers are sliding and rockfall. An avalanche can sweep you away or bury you.
- When to be especially careful: Rapid warming or wind loading for cornices, firm snow or frequent rockfall for snow gullies, and heavy snowfall, strong winds or rapid warming for avalanches.
- What beginners should do: Give corniced edges a wide berth. Cross snow gullies only with appropriate gear and skills. Avoid avalanche terrain when conditions are dangerous.
All three hazards change with the weather and time of day. Learning the basics of mountain weather helps you recognize them in the field.
Before you go
Ask the local authorities or the nearest hut about snow conditions. Know where to find official weather forecasts from the Japan Meteorological Agency and avalanche information from local organizations such as the Japan Avalanche Network. For a first trip into snowy terrain, you can also use Nordwand to contact a certified guide.
Further reading
- Japan Meteorological Agency, weather information
- National Police Agency of Japan, annual report on mountain incidents
- Japan Mountaineering and Sport Climbing Association (JMSCA), mountain safety materials
- Japan Avalanche Network (JAN), avalanche education materials
References and sources
- U.S. National Avalanche Center, Cornice Fall
- Hakuba Municipal Mountain Huts, Hiking Guide
- Japan Avalanche Network, Avalanche Types and Characteristics
- U.S. National Avalanche Center, Slope Angle
- Avalanche Canada, Avalanche Risk Reduction Procedures
- Kurobe City, Shirouma Trail Conditions and Snow Gully Equipment