
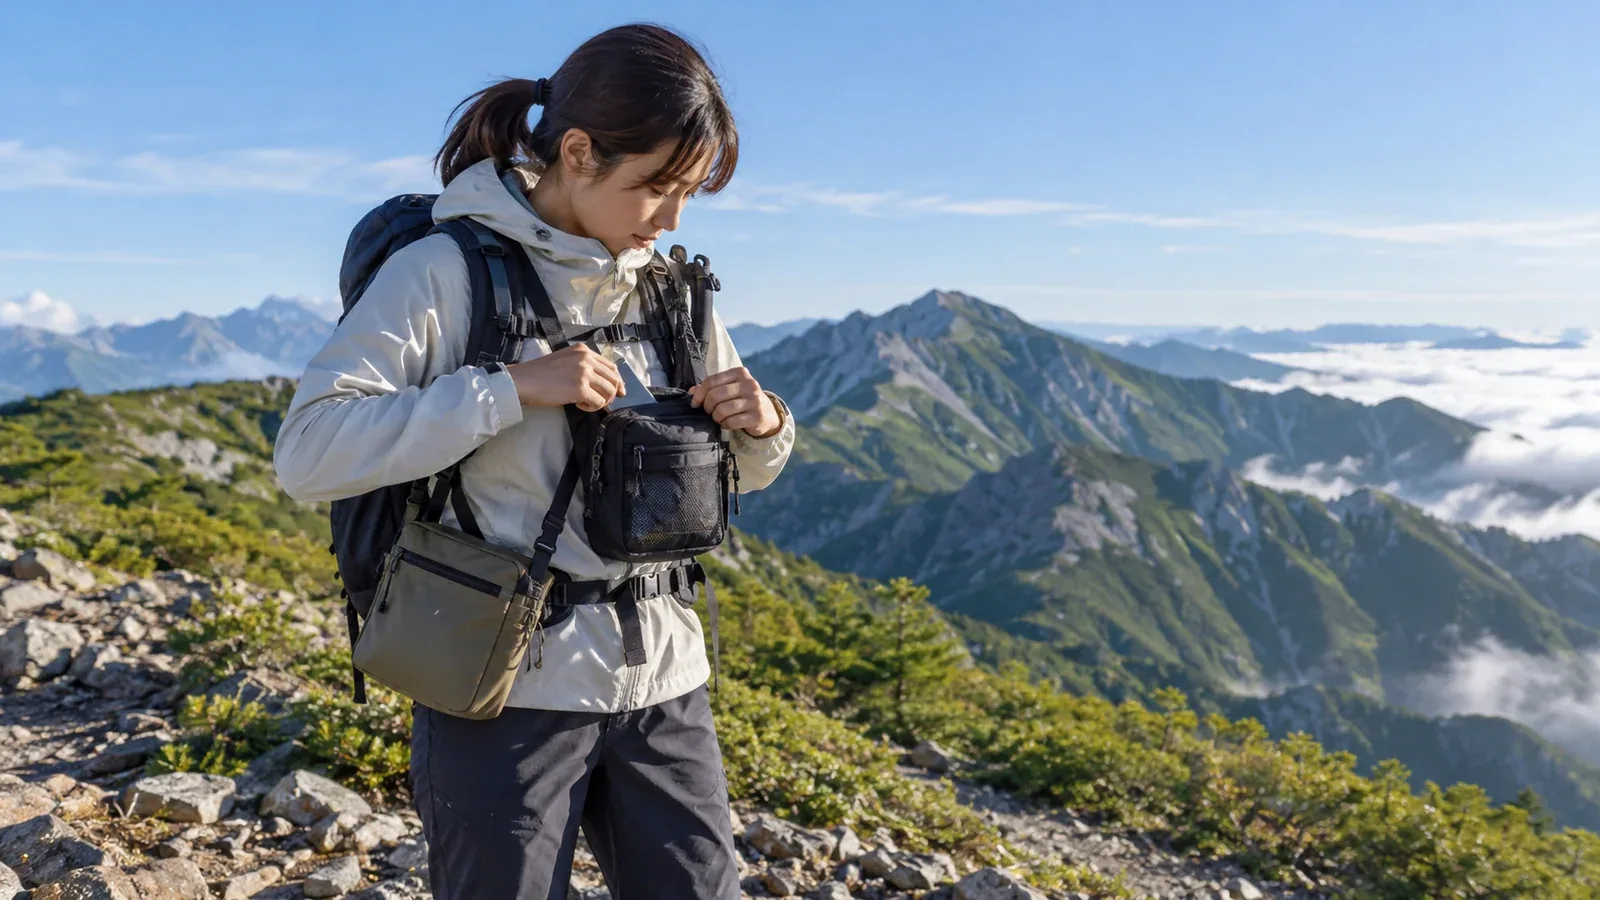
Both crossbody pouches and chest bags put small items within reach without taking your backpack off. The main differences are their shape and how they attach to your body.
If you’re deciding which to buy, compare how each is built, how it feels while walking and what it can hold.
How crossbody pouches and chest bags are built
A slim crossbody pouch, or sacoche, hangs from a single strap worn diagonally across the body. It grew out of the feed bags handed to riders in road cycling races. On a hike, it’s useful for things you reach for often, such as a map, phone or snacks. A thin one folds away into your pack when you aren’t using it.
A chest bag fastens in front of your chest. Some come with their own harness, while others clip to your backpack’s shoulder straps or other points. Keeping it close to your body helps limit movement. Deeper models can hold bulkier items like a wallet or first-aid supplies.
A slim crossbody pouch is a good candidate for quick access to flat items. Consider a chest bag if you carry bulkier things or want to limit bouncing.
How the bags move while you walk
Balance matters on a trail. Pay attention to anything on the outside of your pack or clothing that can swing as you move.
A crossbody pouch on a single strap can swing away from you when you lean forward. The fuller it is, the more noticeable the movement may be. On rocks and ladders, the bag or strap can catch on obstacles.
A properly fitted chest bag can move less. Depending on how it sits, though, it can press on your chest or obscure where you’re putting your feet. The area in contact with your body can also get sweaty in warm weather. Try the bag loaded and check that you can breathe deeply, move your arms and see your feet.
Choose by what you need to carry
Think about the shape of your gear and how often you’ll reach for it.
When a slim crossbody pouch works well
- Phone, map or compass: A wide opening makes flat items easy to take out and put away.
- Trail snacks like bars and gels: With few clothing pockets, a pouch makes snacks easy to grab when you stop in a safe spot.
- Light day hikes: A pouch is handy with a small pack and only a few things to keep within reach. For running, choose gear that stays close and doesn’t bounce.
When a chest bag works well
- Wallet, keys and emergency whistle: Use a pocket you can close or a keeper loop for small items you can’t afford to lose. Keep your whistle where you can reach it.
- Light rain layer or folding sunglasses: A deeper bag can hold items with some bulk.
- Ridge traverses and multiday trips: Keep items like your wallet or ID together and accessible without taking your pack off.
Is it worth carrying both?
One option on a day hike is to put your wallet, medication and emergency contacts in a chest bag and keep your phone and snacks in a crossbody pouch. But two bags in front can block your view or get in the way of your arms. First see what you can carry in a single chest bag or fit into a single slim pouch.
What to check in the materials and design
Water protection: Even a water-repellent fabric can let water in at the seams or opening. Check the specs and put your phone or paper map in a suitable waterproof pouch when needed.
Opening: A wide opening helps you see what’s inside. Keep magnetic closures away from your compass. Choose enough pockets to separate small items and reach them easily.
Weight: Both capacity and empty weight vary by model. Weigh the bag with your intended gear to judge what you’ll carry in front of you.
Backpack compatibility: For a model that attaches to your backpack, check the fit with your existing straps and attachment points before buying, in a shop or against the product specs.
What to do on rocks, chains and ladders
A bag in front can get in the way on steep ground.
- Before entering the section, check that the bag and straps won’t catch on the rocks or ladder and that you can see your footing.
- If a crossbody pouch is likely to swing or snag, stop somewhere safe and put it inside your pack.
- If a chest bag blocks your view or restricts movement, take it off and put it inside your pack before you enter the section.
- Get everything set so you can focus on your handholds and footholds without reaching for the bag midway through.
If you’re unsure whether your kit suits the route, ask a local guide or another knowledgeable person before setting off.
Try it with the gear you plan to carry
First list what you want within reach without taking off your backpack. In the shop, try the bag with those items and your pack on. Check access, arm movement, breathing and your view of the ground. Search Nordwand’s partner shops to find somewhere to try a bag, or ask the community how they carry small items on a traverse.