
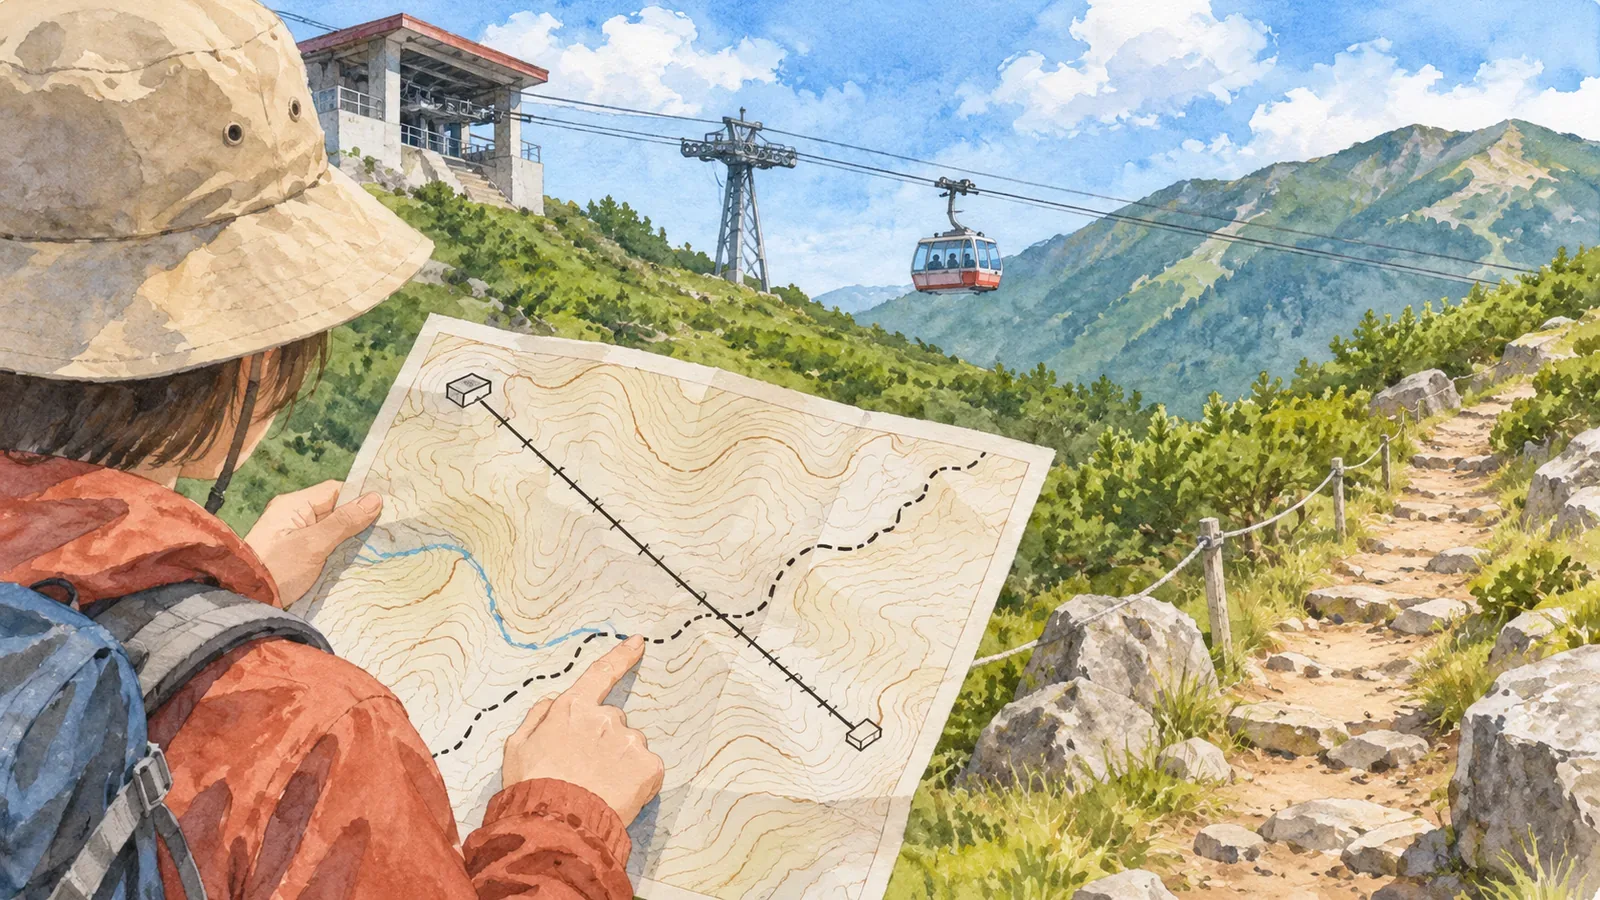
A line for a ropeway differs from one for a trail you can walk. When tracing a route, look up the pattern in the legend. Two lines can look equally thin and mean different things. Even when a ropeway and a road cross on the map, the crossing tells you nothing about access to the lift. Using the Geospatial Information Authority of Japan's mapping specifications and published examples, checked on October 28, 2026, this article shows how to keep walking and riding segments separate.
Use the legend to distinguish a solid line with marks from a dashed line
In GSI's specifications for 1:25,000 topographic maps, footpaths appear in the table of road symbols, while ropeways are listed with railways. The railway category includes conventional railways as well as ropeways. A line crossing a mountainside may represent either type of infrastructure.
In the symbol table, a footpath is a dashed line with gaps. A ropeway is a continuous line with small, repeated marks. Both symbols are drawn in black, so colour alone cannot distinguish them. Find both in your map's legend and see whether each line has gaps or repeated marks.
This distinction comes from GSI's published symbols and specifications. Hiking apps and other maps can use their own route markings. Where a highlighted itinerary is superimposed on the map, check the original symbols and the overlay separately.
A curved line is no guarantee of a footpath, and a straight line is no guarantee of a ropeway. The point of this exercise is to match the pattern to an entry in the legend, regardless of whether the shape looks like a path.
What the definitions of ropeways and footpaths tell you
The same specifications list aerial tramways, ski lifts, conveyor belts and similar equipment under the ropeway symbol. They show major installations intended to be permanent. GSI's Kids page gives the same examples. Since the category includes conveyor belts, some mapped ropeways may have no passenger service at all.
A footpath is a road less than 1 m wide whose centreline has been recorded. GSI's Kids page includes paths commonly used for hiking or sightseeing, routes that provide essential connections between settlements, and paths leading to important places. The term “footpath” covers a wider category than maintained trails for the general hiking public.
The 1 m figure defines a width category. Measuring the thickness of a printed dashed line will give you no usable estimate of the walking surface. The spacing between the small marks on a ropeway line likewise tells you nothing about where to find pylons or boarding points. The pattern and the individual features on the ground do not match one for one.
Think of a ropeway symbol as marking equipment and a footpath as one category of road. Identifying the line still leaves two questions: whether the equipment is running or whether the path is open. Check what the symbol represents and whether you can use it on your chosen day as separate steps.
Look at the Mount Tsukuba example and at line crossings
GSI's ropeway page shows a map and photograph of the Mount Tsukuba Ropeway in Tsukuba, Ibaraki Prefecture. A red box on the map highlights the ropeway line and its name as the line crosses the contours. The photograph shows a cabin suspended from cables. The pair shows how a line on a map can represent transport above the ground.
The footpath page also highlights a line in red. Inside the box you can see the name Nakasendo and a winding dashed line. Compare the two examples by looking at the patterns of the lines themselves, setting aside the red boxes and labels. This is a chance to practise following a route without accidentally switching to a contour or place-name label.
These pictures are examples to practise reading symbols. They cannot establish current boarding entrances, hiking itineraries, or trail conditions. Find up-to-date maps and notices that cover the actual sections you plan to use.
Crossings deserve a closer look. Under the specifications, when a ropeway crosses a road or railway, both symbols are drawn on top of each other. The crossed lines tell you nothing about transfers or connections on foot at that point. When tracing a route, check that you have not switched from one line to another at a crossing.
Review walking and riding segments separately
For each segment of your planned itinerary, note whether you will walk or take a lift. Leave an unidentified line as an open question instead of treating it as a walking route. If you plan to ride, confirm the entrance in the operator's visitor information. The end of a line on the map alone tells you little about how to board.
Look up operating notices for any lift you plan to take, and restrictions and trail conditions for any section you plan to walk. If you plan to ride on the way up, check whether you can take the lift back at the time you expect to return. These questions are our editorial team's way of organising a route plan; consult operators for the latest hours.
The Japan Sport Council's manual for high school mountaineering instructors recommends planning with topographic maps, hiking maps and guidebooks, using the newest information available. It also recommends checking whether paths shown on topographic maps have since been abandoned. Identifying a footpath symbol leaves its current condition to be checked.
The manual asks readers to prepare backup plans and ways to turn back as thoroughly as the main plan. If a lift is out of service, following its line on foot is no substitute. Look up a separate walking route as an alternative. If you change your mode of travel, also check the route itself and the time it takes.
A line you cannot identify gives no basis for assuming a section is walkable. Keep it as a question during planning and look for a source that can answer it. There is no need to follow an unknown line in the field. This process helps organise checks; it offers no guarantee that you will stay on course or avoid danger.
Check the symbol first and availability second
On GSI maps, a footpath is dashed and a ropeway is a continuous line with repeated marks. Both are black, so check the pattern and legend. A crossing with a road cannot tell you whether there is anywhere to board or switch to a walking route.
Mark walking and riding segments in your plan and check current conditions for each. Check your return and any alternatives as well, keeping ropeway lines separate from possible shortcuts on foot.
References and sources
- Geospatial Information Authority of Japan (GSI): 2013 specifications for 1:25,000 topographic maps, including the March 30, 2026 revision, Articles 26–28 and ropeway symbol 38
- GSI Kids: Map symbol for ropeways and lifts, explanation, symbol, and Mount Tsukuba example
- GSI Kids: Map symbol for footpaths, explanation, symbol, and map example
- Japan Sport Council: Safe and Enjoyable Mountaineering, a manual for high school mountaineering instructors, Part 2, Chapter 1, printed p. 26