
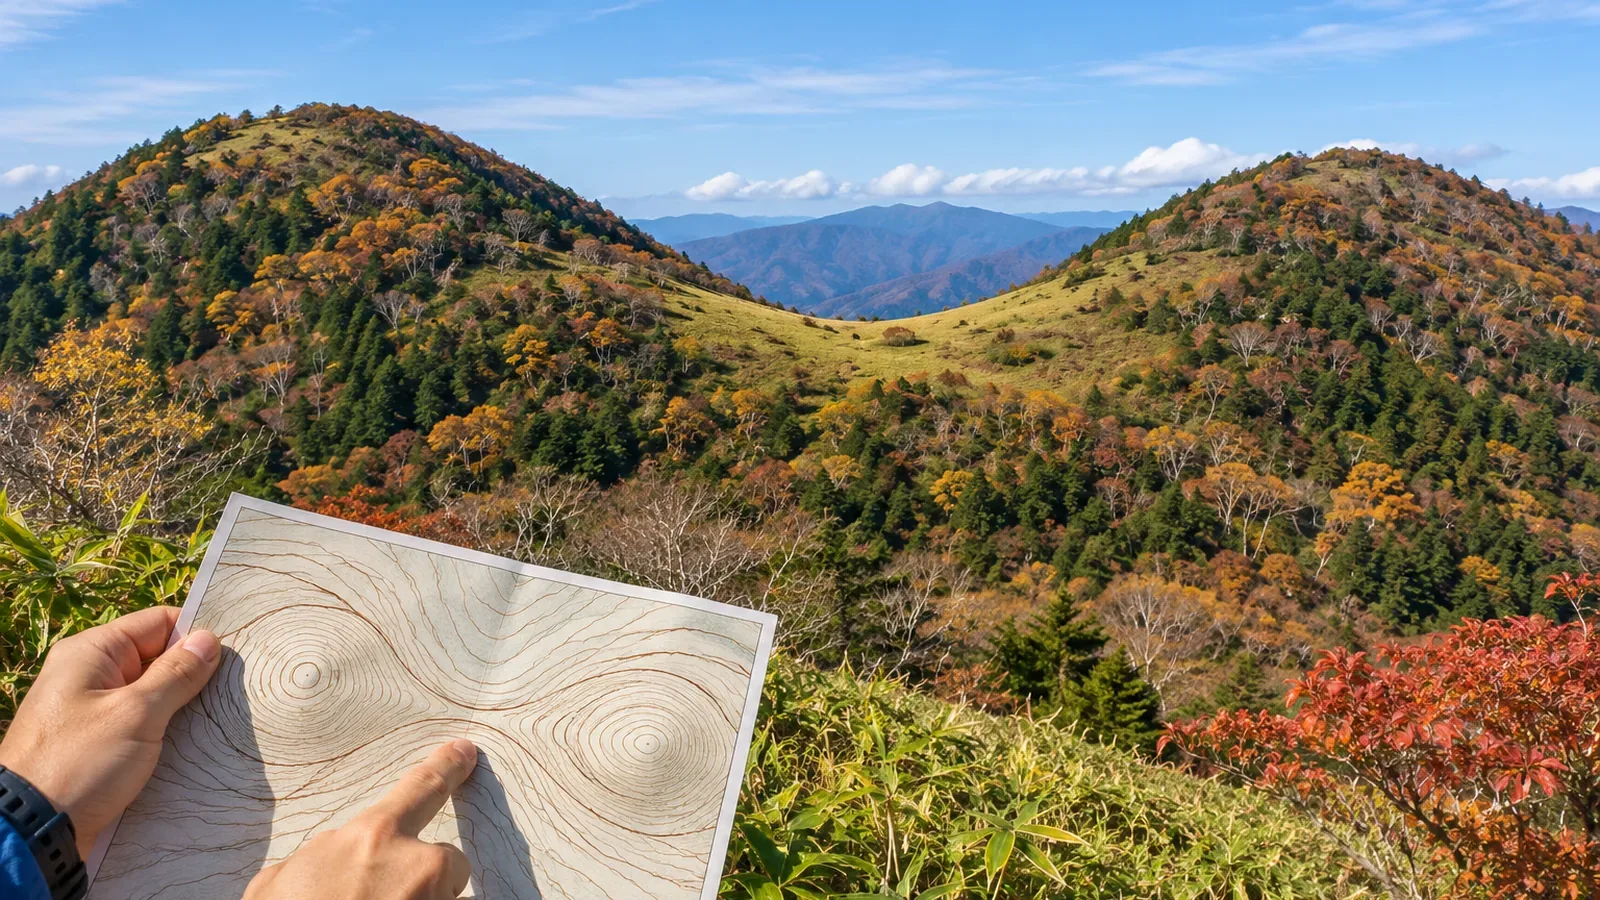
To find a small saddle on a map, start by deciding which two high points on which ridge you want to examine. Using the Geospatial Information Authority of Japan's materials checked on October 28, 2026, we'll distinguish the ridge from the planned route and record what the contours do and do not show. The steps for identifying candidates are suggestions from the editors.
Identify the two high points on the ridge first
GSI's guide to map reading for safe hiking describes a col or saddle as a low dip between two peaks. The next panel pairs contour maps with three-dimensional aerial photographs to show saddles and passes, including features named tōge or nokkoshi. Use the two high points and the ridge joining them as context when you look for a dip on the map.
As a practice exercise, choose the section of ridge to examine and see whether you can point to the high ground at both ends. A low number on the trail alone doesn't locate a saddle. If you can't identify the ridge or the high points, leave the basis for identifying a candidate unverified.
A mapped trail does not necessarily follow the ridge all the way. A traverse around a slope or across a valley may descend and climb again without crossing a saddle on the ridge. The ridge is the landform you're studying, and the trail is the route you'll walk. Note where the two coincide and where they diverge. Stay on your planned route when checking the terrain in person.
Follow the contour elevations and leave positions between lines open
On GSI's 1:25,000 topographic maps, intermediate contours connect points of equal elevation at 10 m intervals and thick index contours are at 50 m intervals. At 1:50,000, the intervals are 20 m and 100 m respectively. Check your map legend, identify which number belongs to which contour, then read how the elevation changes along the ridge.
On a 1:25,000 map, the contour immediately below the 500 m index contour is 490 m, and the next index contour down is 450 m. There are five 10 m intervals from 500 m to 450 m. That follows from subtracting the intervals. Keep the number of lines separate from the number of intervals, and do not count a supplementary contour as a full intermediate interval.
Knowing the elevation where you cross a contour does not establish the lowest point between two contours. Likewise, the innermost contour around a peak does not give the exact summit elevation. If you cannot find another source, such as a labeled spot elevation, record the contours you could read and the range that remains unresolved.
Imagine three points on the same ridge at 600 m, 580 m, and 610 m. The middle point is lower than the other two. These are illustrative elevations. If all you have on a real map are contour crossings, don't assign 580 m to the lowest point between them. The pattern of rises and dips narrows down candidates, but it cannot establish the exact minimum or prove there is only one saddle.
Leave small changes that don't cross a contour unverified
GSI explains that it adds supplementary contours where intermediate contours alone cannot adequately show a gentle slope or complex terrain. The supplementary intervals are 5 m or 2.5 m, and the 2.5 m lines are labeled with their elevation. If you see one, check its type and label to add to what you read from the intermediate contours.
A rise or dip that never reaches the elevation of an intermediate contour won't change how many of those contours you cross. An elevation change of less than 10 m can still appear if it crosses a contour elevation. You cannot use the interval to conclude that all changes under 10 m disappear or that land between the same contours is flat. This is the editors' application of the definition of contours.
Supplementary lines need not appear at every small saddle either. Record what you can see, such as a labeled supplementary contour, no visible supplementary contour, or an unidentified line type. A missing line doesn't establish that there is no saddle or that the elevation difference is zero.
Keep more than one candidate open if the trail leaves the ridge, the lines are hard to read, or there are several dips. Following contours on a map and finding the same point on the ground are different tasks. Use other landmarks to establish your location if the saddle remains unverified.
Use elevation profiles and shading to look for discrepancies
The profile tool in GSI Maps graphs elevation changes along a line or route you draw. Move the pointer over the profile or the route to see the elevation at that position. Check that your drawn line follows the part of the ridge you're examining, then use it to compare the sequence of rises and dips around the candidate.
If a straight profile line departs from a curving ridge, it may pick up elevations on a different slope. If you see a dip on the graph, first check where you drew the line. GSI Maps calculates elevations from tiles, and some small features may be missing depending on the original data and the terrain. Treat the smaller rises and dips as estimates.
The shaded relief map simulates light from the northwest, with brighter northwest-facing ground and darker southeast-facing ground. It is a terrain rendering rather than a photograph taken in sunlight. GSI uses it to help identify ridges and valleys, and explains that step-like shapes can appear at boundaries between datasets surveyed in different ways or at different times. Check a small shaded step against other evidence before concluding there's a saddle.
In your notes, record the ridge section, the contours and numbers that support the candidate, and the positions or elevations that remain unclear. If different views disagree, revisit where you drew the line or how you read the map. Check access, footing, and possible places to rest separately from maps and profiles.
Record how the ridge connects and what remains unclear
To find a small saddle, first establish the ridge between two high points and look for lower ground along it. Record where the route diverges from the ridge, positions and elevations you cannot resolve between contours, and small features that may be missing. Use profiles and shaded relief to check for discrepancies. Verify your location and safety independently. On the trail, stop to read the map where your footing is stable and you won't block others. If there is no suitable spot, wait until there is.
References and sources
- Geospatial Information Authority of Japan | Map reading for safe hiking (1) and (2), PDF pages 1–2
- Geospatial Information Authority of Japan | Map symbols: intermediate contours
- Geospatial Information Authority of Japan | Map symbols: index contours
- Geospatial Information Authority of Japan | Map symbols: supplementary contours
- Geospatial Information Authority of Japan | Elevation profiles
- Geospatial Information Authority of Japan | Finding the elevation of the land
- Geospatial Information Authority of Japan | Shaded relief maps
- Geospatial Information Authority of Japan | How elevation tiles are made and how GSI Maps calculates elevation